Offering SSL Web services
This walkthrough details how to create a Local Certificate Authority (CA) so a self-signed certificate can be created. This is an alternative to using a certificate from a respected Certificate Authority like Let’s Encrypt, or purchasing a certificate from Verisign or Thawte. The advantage to using a certificate from a respected CA is that it then usually means people trying to connect to your web service will NOT need to manually install the CA because it came pre-installed on the machine from the operating system vendor (i.e. IBM, Microsoft, Sun, etc).
Start the *ADMIN Server
-
Verify that the *ADMIN HTTP server job is running with the following command:
WRKSBSJOB SBS(QHTTPSVR)If you don’t see *ADMIN in the list, please run the following command to start it:
STRTCPSVR SERVER(*HTTP) HTTPSVR(*ADMIN) -
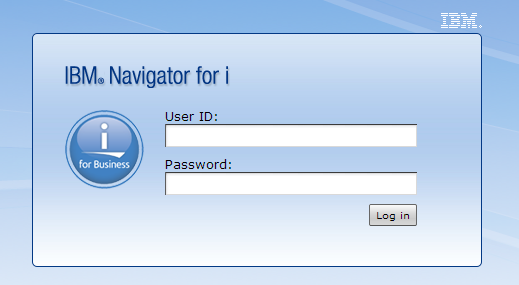
After you’ve ensured that the *ADMIN server is running, open a web browser (Internet Explorer is recommended), and go to http://YourIBMIPAddress:2001 - you should see a login page as seen below:
Create SSL Application
-
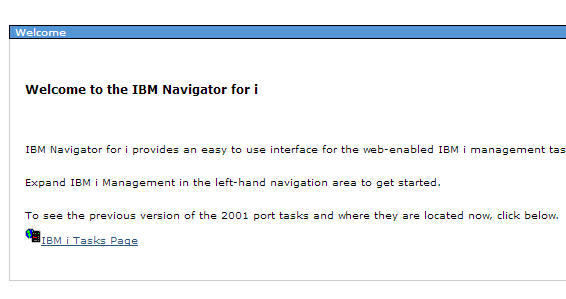
Enter your IBM i username and password, and click “Log in”. You should see a page split into two sections - a menu on the left, and a larger content area on the right that looks like the below image:
-
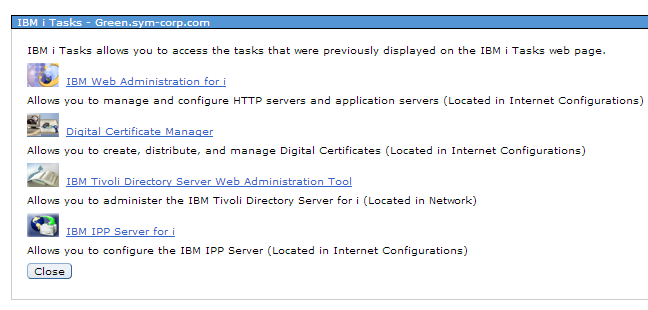
Click the “IBM i Tasks Page” link.
-
Click the “Digital Certificate Manager” link. You may be prompted to log in again - if you are, enter your IBM i username and password. It is recommended to log into the Digital Certificate Manager on a profile with elevated authority.
-
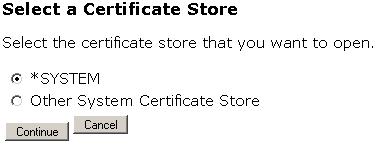
After you are logged in, click on the “Select a Certificate Store” button in the far left of the page. Then, select the *SYSTEM store and press the “Continue” button. If you do not see *SYSTEM, you will need to go set up SSL on your IBM i.
-
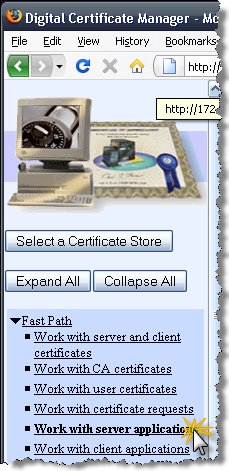
Select the “Work with server applications” link within “Fast Path”.
-
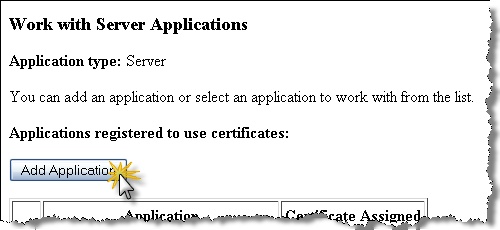
Select the “Add Application” button on the “Work with Server Applications” screen.
-
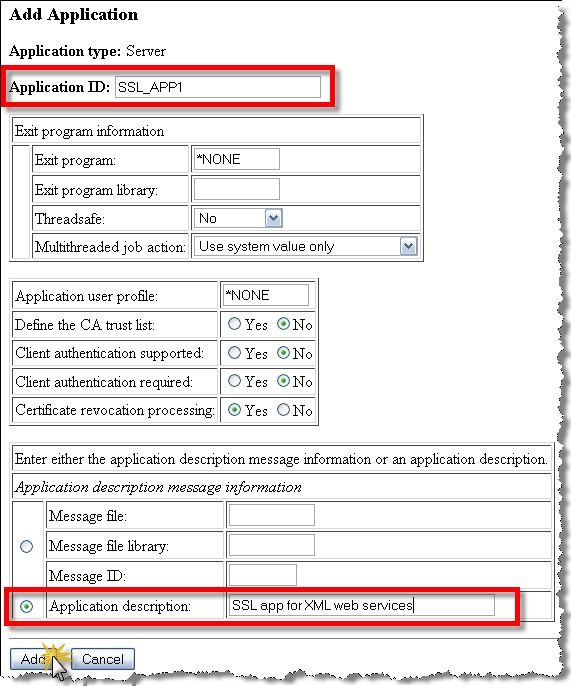
Fill out the “Add Application” form by specifying the “Application ID” field and the “Application description” field.
-
Click the “Add” button to finalize your application.
Create a Certificate Authority
-
Confirm that you have the *SYSTEM certificate store selected. To change your selected certificate store, click the “Select a Certificate Store” button and choose the *SYSTEM option.
-
From the left menu, Select the “Create a Certificate Authority (CA)” link.
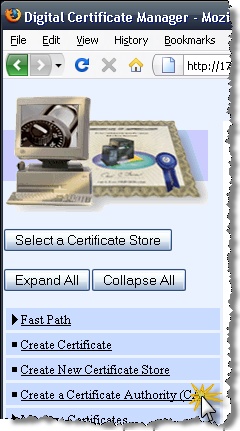
-
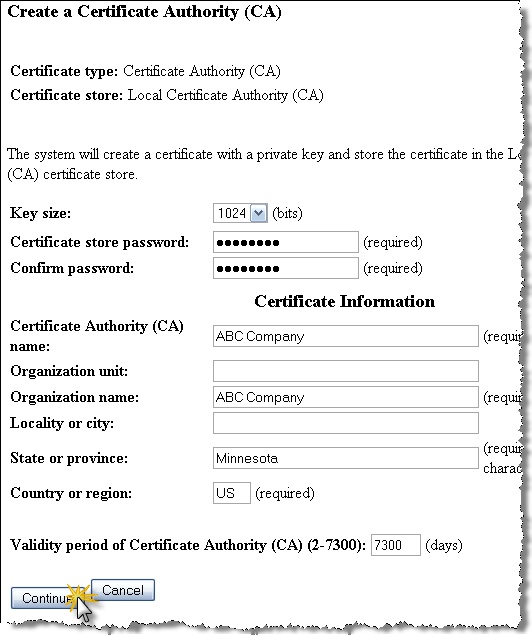
Fill out the “Create a Certificate Authority (CA)” form as demonstrated. Select the “Continue” button.
-
The “Install Local CA Certificate” screen allows you to optionally install your newly generated certificate in your browser. This step is not immediately required, and you can return to this certificate to do this step later.
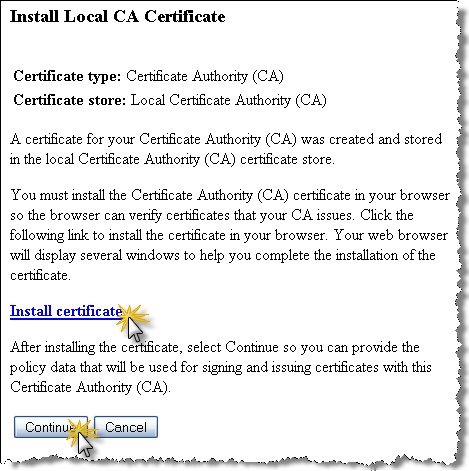
Installing Certificate
If you select the “Install certificate” link, your browser will generally present you with a dialog to take you through the process of downloading the certificate to your desktop. You may see a window similar to this:
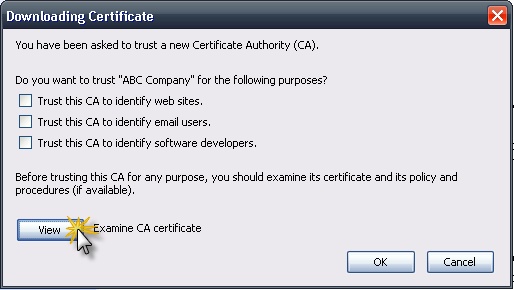
You can click the “View” button to display the certificate, which will allow you to export and download the certificate file. For more information on the export process, see Installing Certificate Authorities.
-
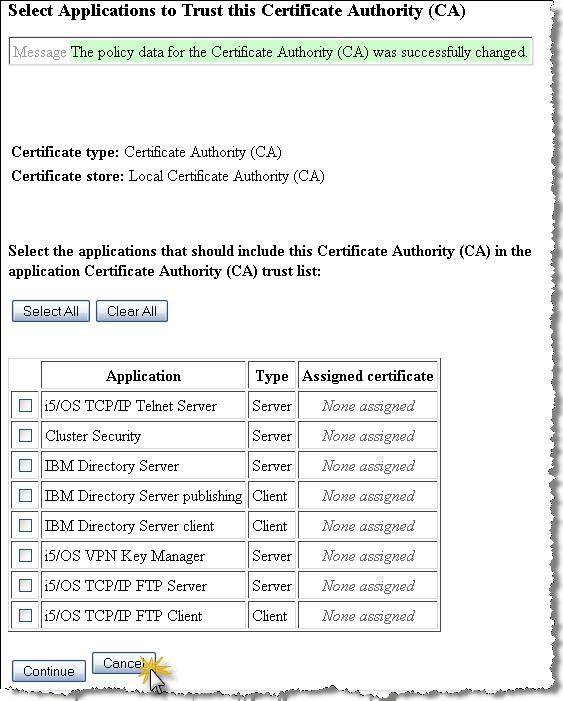
Modify the Policy Data values if necessary. Below is a common approach for this page as it keeps the certificates valid for the longest period of time (i.e. 2000 days).

-
At this point the Certificate Authority creation process is complete. You can select the “Cancel” button at this point and continue onto the next section.
Creating a Certificate for Your Application
Ensure that you have you *SYSTEM certificate store selected before continuing.
-
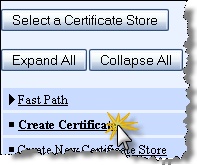
In the left menu select the “Create Certificate” link.
-
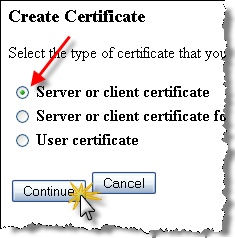
On the “Create Certificate” page select the “Server or client certificate” option and click Continue.
-
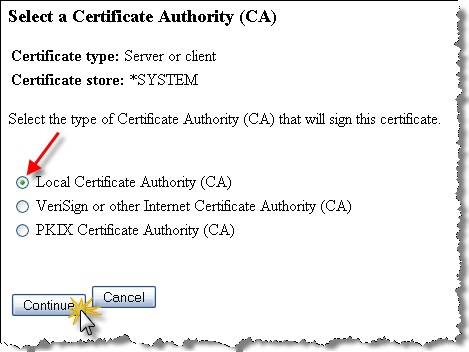
Select the “Local Certificate Authority (CA)” option and click Continue.
-
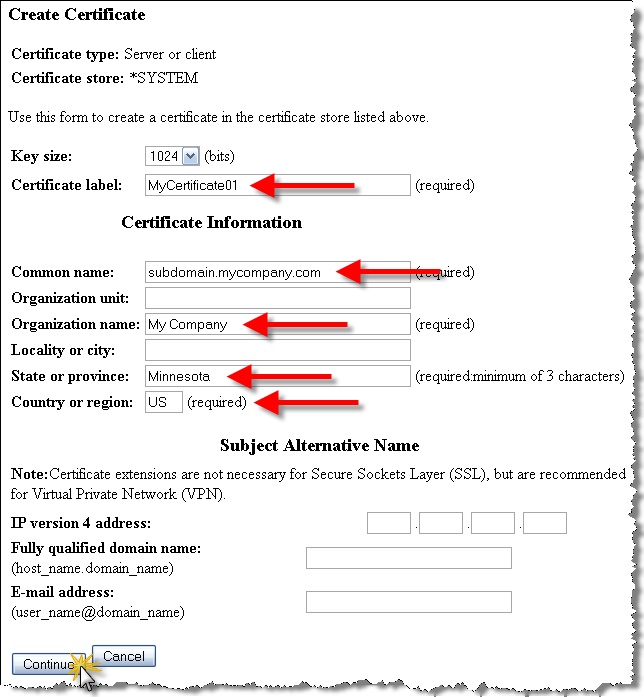
Populate the fields on the “Create Certificate” page as demonstrated. The “Certificate label” field can be any identifiable value that will allow you to easily reference this certificate later on. The “Common name” value is important because you will want it to match the exact URL of the web service being offered on your IBM i. Otherwise, this may cause security warnings when trying to connect to your service.
The fields in the “Subject Alternative Name” section do not need to be populate in the vast majority of use cases.
-
Click Continue to proceed.
-
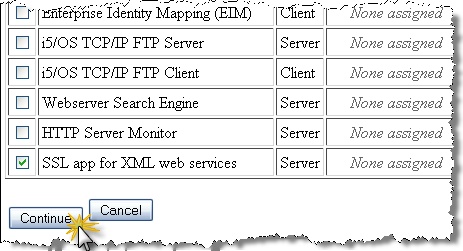
On the “Select Applications” page, check the box for the SSL application you created earlier – in this case, “SSL app for XML web services”. Select the “Continue” button.
-
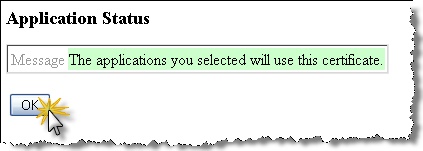
Click OK to complete the creation of the self signed certificate and its assignment to the SSL application.
Apache Configuration
Your SSL application will need to be associated with an Apache server instance. This can either be an existing server instance, or you can create a new HTTP server instance using the CRTRXSSVR command.
We will make use of the RXS command HTTP to work with our Apache server instance and modify the configuration file (/www/[servername]/conf/httpd.conf). This file can also be modified through RDi, or through the IBM Web Admin panel.
Note: In these instructions, we reference the RPG API Express install library of RXS, and our HTTP server created with CRTRXSSVR is also named RXS. These values should be substituted as needed to match your system setup.
-
Open the httpd.conf configuration file for editing with the HTTP command:
HTTP [servername] *CONF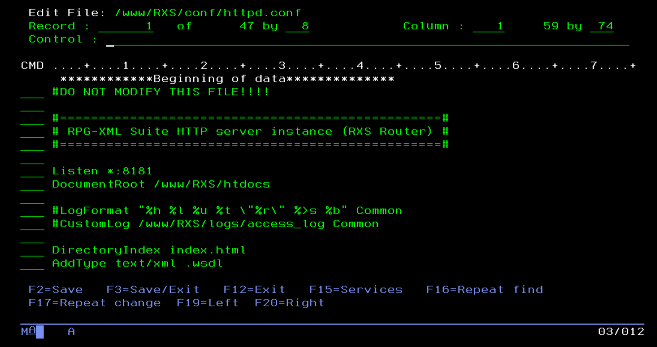
-
Add the following lines to your httpd.conf file:
 LoadModule ibm_ssl_module /QSYS.LIB/QHTTPSVR.LIB/QZSRVSSL.SRVPGM
 Listen *:443
 SetEnv HTTPS_PORT 443
 SSLEngine On
 SSLAppName [your SSL application in DCM]
 DocumentRoot /www/[servername]/htdocs
 CGIConvMode %%EBCDIC/EBCDIC%%
 ScriptAliasMatch ^/(([^/.]+/)*[^/.]+)$ /qsys.lib/RXS.lib/$1.pgm
 <Directory /qsys.lib/RXS.lib>
 allow from all
 order allow,deny
 options +ExecCGI
 </Directory>
If your server was created with CRTRXSSVR, some of these lines may already be present. Do not duplicate these lines.
-
If you already have the ScriptAliasMatch line present, but it looks like this (with either RXS or MYRXS):
ScriptAliasMatch ^/RXS/(.*) /qsys.lib/RXS.lib/$1.pgmWe’d recommend replacing it with the version in the code above, which has the same functionality but with a more modern syntax:
ScriptAliasMatch ^/(([^/.]+/)*[^/.]+)$ /qsys.lib/RXS.lib/$1.pgmsubstituting MYRXS.lib for RXS.lib if your previous statement referenced MYRXS.lib.
-
Stop the Apache server using the HTTP command:
HTTP [servername] *END -
Start the Apache server:
HTTP [servername] *START -
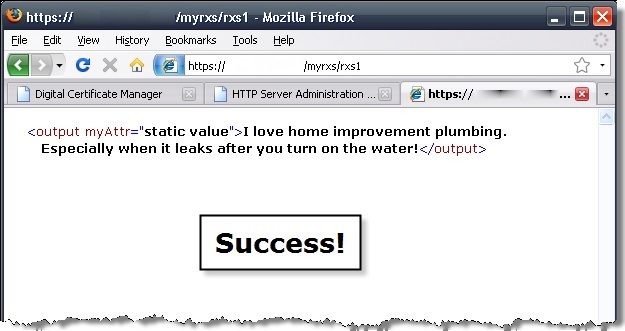
You should now be able to access your web services using SSL. To confirm, try loading this RXS example program in your browser:
https://[YourIBMIP]/MYRXS/RXS1We are not specifying a port because, by default, the browser will go to port 443 when we specify https.
Because we are using a self-signed certificate, and not one from a trusted Certificate Authority, you may need to click through a security warning dialog to allow the page to load.
If your application and server are configured correctly, you should see a page similar to the one below: